How to Add Google Maps API in Next.js 13? Step by Step
Before to start with the code of Next.js we need to take in account that for use Google Maps API it’s important to have this checklist:
- Google Account ✅
- Log In in Google Cloud ✅
- Payment Method (You aren’t gonna pay nothing unless you exceed your free resources) ✅
- An API KEY (We are gonna show you how you can get it)✅
Now that we know which things we are gonna need we can start with the process of getting the API KEY of Google Maps, then we are gonna start with the Next.js code.

Get the Google Maps API KEY.
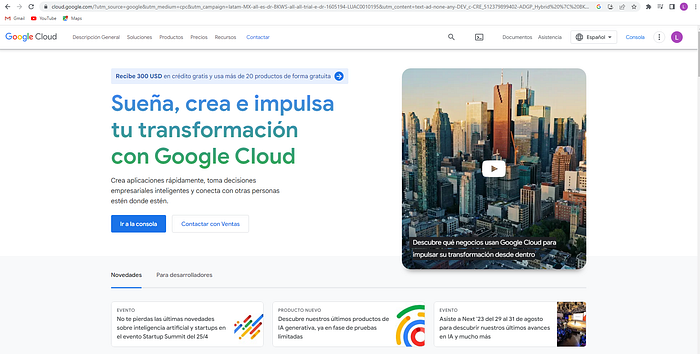
The first step is to look for Google Cloud, we need see this screen:
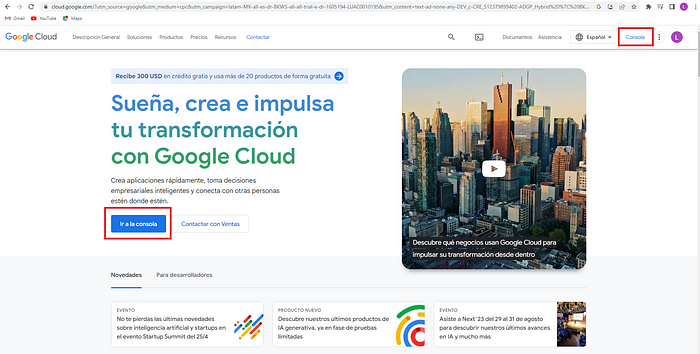
The second step is to go to the console of google cloud, you can find the button in the right top of the screen or in the header of the page, click it!
You’re gonna be redirect to the console.
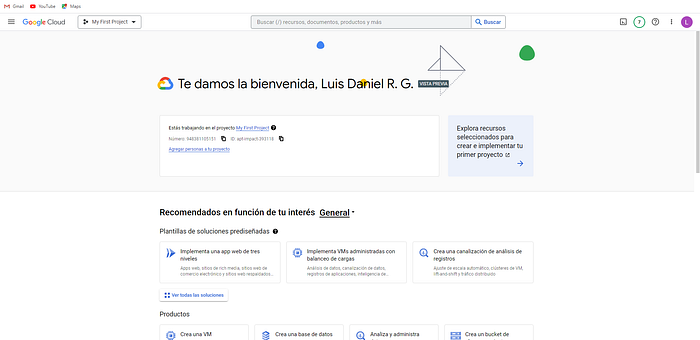
Now that you are in the console of google cloud you need to create a new project.
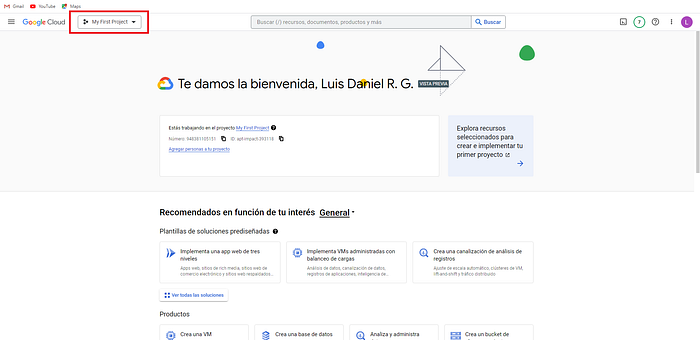
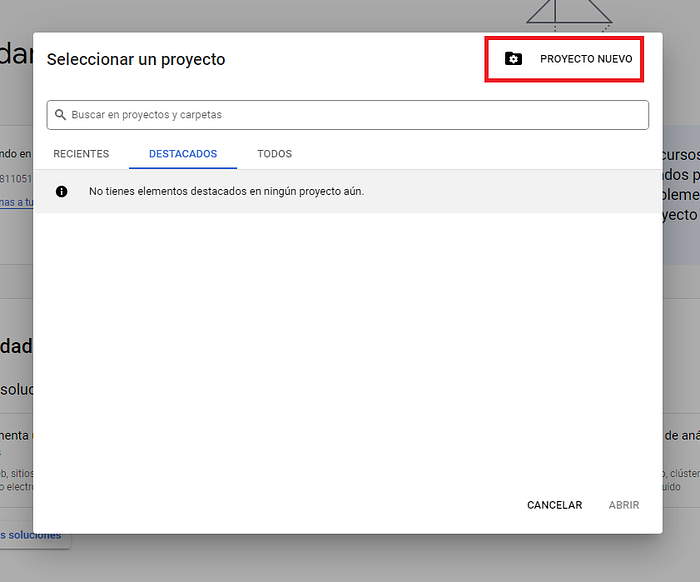
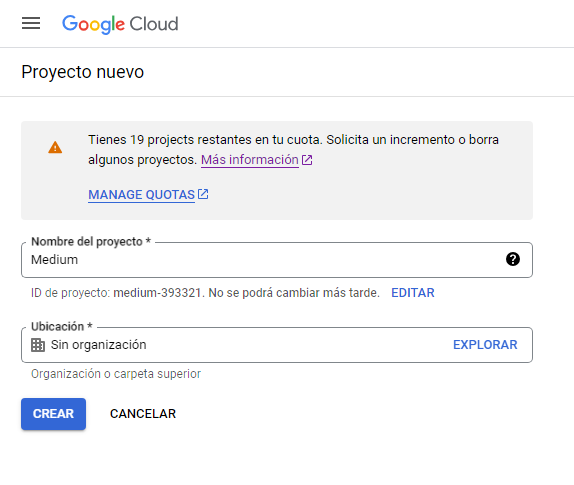
When you already finish to create your new google cloud project you need to be sure that you’re working on it.

Then that you already confirm that you’re working on the project that you recently create it’s time to allow Maps Google Api, first you need to go to the marketplace.

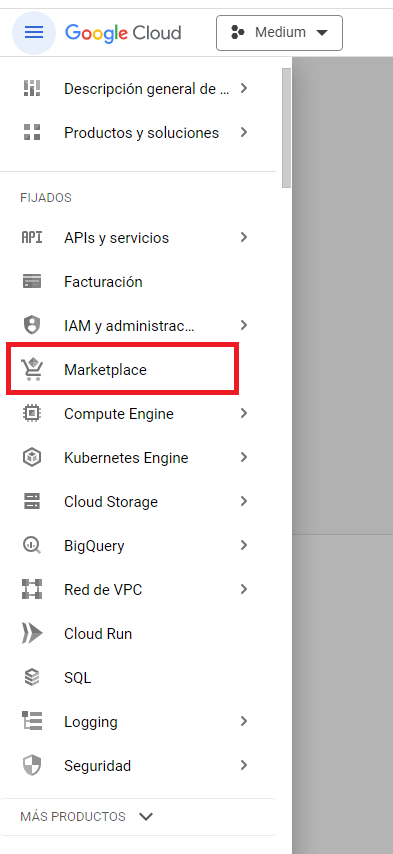
Now that you are in the marketplace you need to search for Maps Javascript Api and click in the first option or in the option that is in the image, then click in allow.

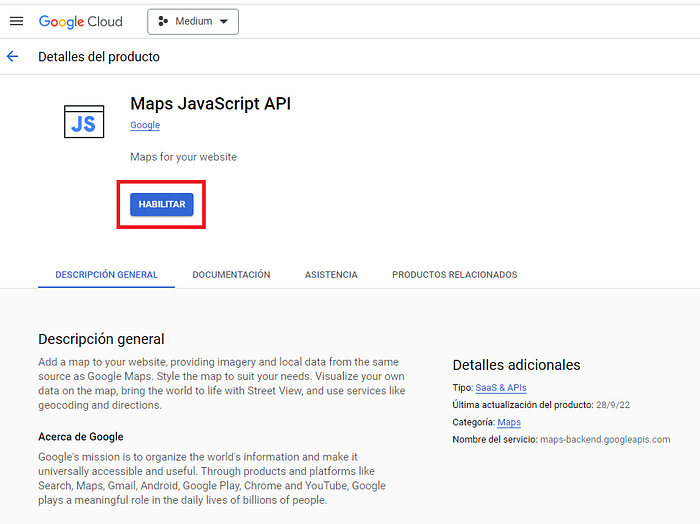
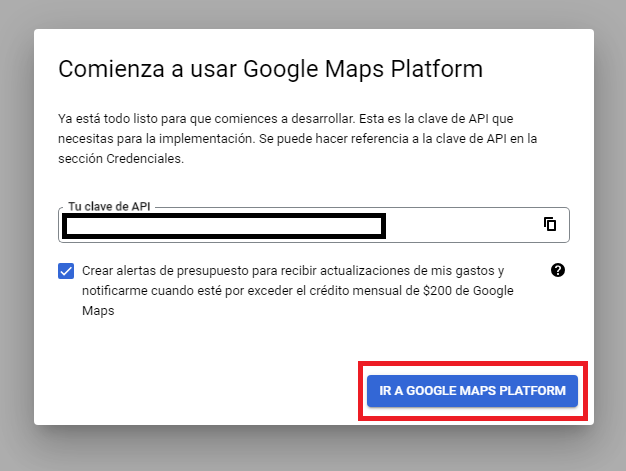
When you click on allow google are gonna show you the following screen with your API KEY and once you already copy your API KEY (don’t worry if you don’t copy it, we can see it later) click on GO TO GOOGLE MAPS PLATFOM.
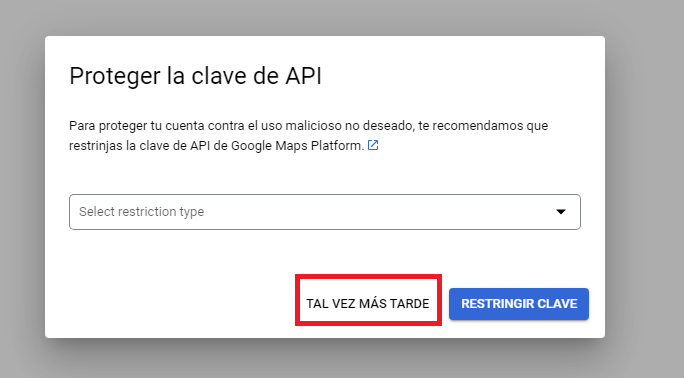
Google is gonna redirect you to the Maps Platform.
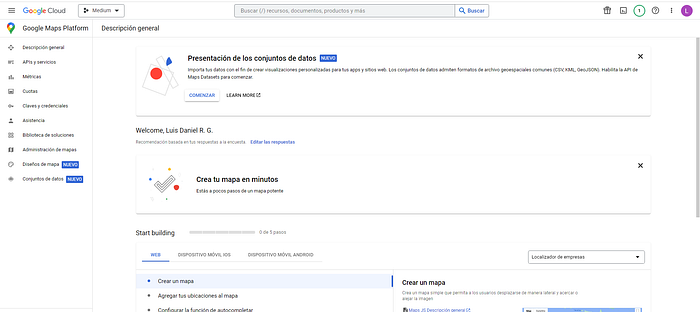
How I Can See My API KEY Again?
You need to be in the Google Cloud Console NOT in Google Maps Platform, then follow the steps:

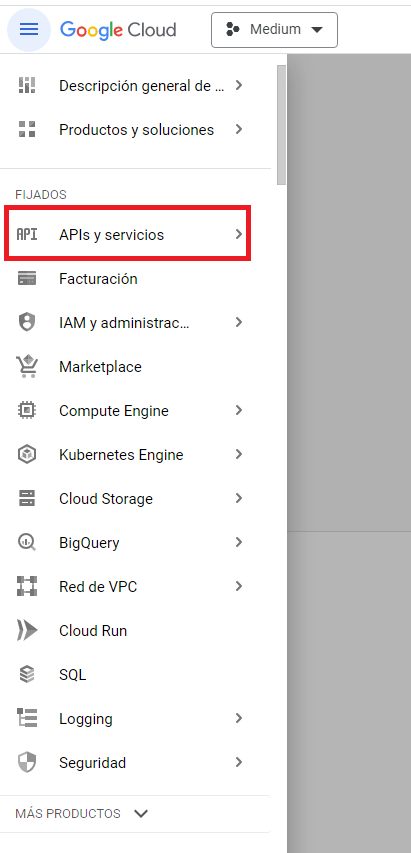
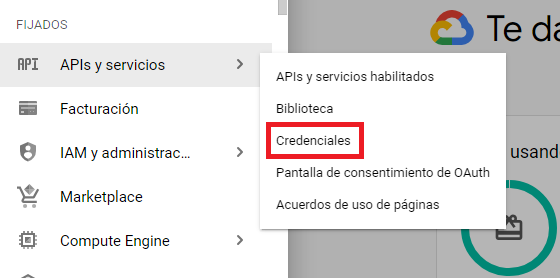

¡¡¡¡¡¡¡¡¡¡IMPORTANT!!!!!!!!!!
You will need to add a payment method, all this procces works without a payment method but if you don’t add it the map won’t be visible and it will make an error.
Summarize
- Go to the console of google cloud ✅
- Create a new project ✅
- Make sure you’re in the project that you create ✅
- Allow Maps Javasript Api ✅
- Copy your API KEY ✅
Adding Google Maps into our Next.js App using Google-Maps-React NPM package.
First we need to install the following package:
npm install --save google-maps-reactIf you have this error:

You just need to add — force at the end of the command:
npm install --save google-maps-react --forceAs we know in Next.js 13 all components inside the /app directory are server components by default, but to implement a google maps we need to change server component to client component.
How we can Change a Server Component to a Client Component?
You need to add at the first line of the component where you are gonna work, as show in the example:
'use client'

const GoogleMap= () => {

    return (
      <h1>Hi!</h1>
    )
}

export default GoogleMap;
¡¡¡¡¡¡¡¡¡¡IMPORTANT!!!!!!!!!!
If you don’t change to a client component you will probably have the following error or similar:
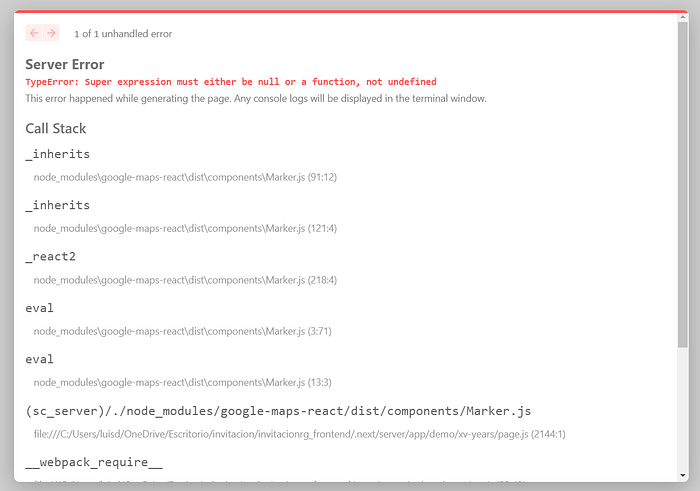
Now that you already have the package installed and you already change your component to a client component we can officially start implementing the Google Map in you App of Next.js!!!
The first step is to import the following elements from the package.
import { Map, GoogleApiWrapper, Marker } from "google-maps-react"Then we need to define some custom styles for our map in an object outside our component, as shown in the example:
'use client'

import { Map, GoogleApiWrapper, Marker } from "google-maps-react"

const mapStyles = {
    width: '100%',
    height: '50%'
};

const GoogleMap= () => {

    return (
      <h1>Hi!</h1>
    )
}

export default GoogleMap;
Another important point is that we need to export the component of the map in a different way because there you’re gonna use your API KEY otherwise it won’t work, export the component as we show in the following example:
import { Map, GoogleApiWrapper, Marker } from "google-maps-react"

const mapStyles = {
    width: '100%',
    height: '50%'
};

const GoogleMap= () => {

    return (
      <h1>Hi!</h1>
    )
}


//Here we use GoogleApiWrapper() that we import of the package
export default GoogleApiWrapper({
    apiKey: "YOUR API KEY"
})(MapGoogle);
Now we can start using the components to show the map that the package give us:
'use client'

import { Map, GoogleApiWrapper, Marker } from "google-maps-react"

const mapStyles = {
    width: '100%',
    height: '50%'
};

const GoogleMap= () => {

    return (
        //The <Map></Map> need the following props
        //initialCenter={} will be the center on the Map
        <Map
            google={window.google}
            zoom={17}
            style={mapStyles}
            initialCenter={
                {
                    lat: 19.020145856138136,
                    lng: -98.24006775697993
                }
            }
        ></MAp>
    )
}

export default GoogleApiWrapper({
    apiKey: "YOUR API KEY"
})(MapGoogle);
Finally if you want a marker in your map the package also give us a component for it, use it as we show in the example:
'use client'

import { Map, GoogleApiWrapper, Marker } from "google-maps-react"

const mapStyles = {
    width: '100%',
    height: '50%'
};

const GoogleMap= () => {

    return (
        //The <Map></Map> need the following props
        //initialCenter={} will be the center on the Map
        <Map
            google={window.google}
            zoom={17}
            style={mapStyles}
            initialCenter={
                {
                    lat: 19.020145856138136,
                    lng: -98.24006775697993
                }
            }
        >
           //The Maker Component have a prop positio={}
           //in which you decide the position of it
           <Marker
              position={
                  {
                      lat: 19.020145856138136,
                      lng: -98.24006775697993
                  }
              }
           />

        </Map>
    )
}

export default GoogleApiWrapper({
    apiKey: "YOUR API KEY"
})(MapGoogle);
Conclusion
At the end of the day it wasn’t difficult to add a Google Map to your Next.js app, we just need to know the PROCESS and HOW, I decide to write this blog because for me was very frustraiting not find updated information and in my own experience I spent a lot of hours looking for this kind of information, I hope this blog help you and save you time, thanks for reading!

